


I’ve worked in some interesting environments. By “interesting” I mean everyone had the keys to the kingdom. Every IT person on staff had domain admin privileges. Yeah. Let that sink in. Of course I’m not alone in my experience at that environment - I’ve heard numerous other stories like this. Remediation is always “planned” but since the policies have been in place for so long, there are a lot of steps that need to be taken to make sure that the necessary access isn’t lost.
In my role as an EM+S consultant I frequently find myself needing Azure Global Administrator rights to get things setup for my clients. Clients are usually hesitant to give the access - and rightfully so. However, what if there was a way to grant me the rights I needed in Azure on a time limited basis that was also monitored?
EM+S E5 licenses have access to a pretty sweet feature called “Privileged Identity Management” or PIM. If your life without PIM is like giving keys to users to unlock specific doors (which you then have to recover when a user should no longer have access to that door); imagine PIM like smart card access to secured spaces. You can’t really easily audit access to a room if a user has a key, and they will always have the access as long as they have the key. However, a smart card system would allow you to monitor access to the secured space, give temporary access to the secured space, and maybe even have a system in place to easily approve/deny access to secured spaces.

If you’re as tired of the “old” way as I am, read on - I’m going to introduce you to the wonderful world of PIM.
NOTE: PIM also supports Azure Resources (like VMs) but we won’t be covering that in this post - we’ll save that for a future post.
Getting Started
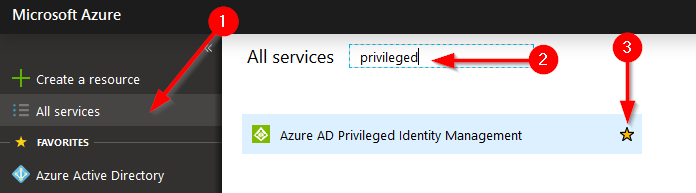
First thing we need to do is consent to using PIM. You will need to logon as a Azure Global Administrator to do this. Note that the user who consents to PIM automatically becomes a “Security administrator” and a “Privileged role administrator” in Azure (these are new roles created by the PIM feature). In the portal you need to find the “Azure AD Privileged Identity Management” blade to add. Click on “All Services”, search for “privileged”, and press the star next to “Azure AD Privileged Identity Management”
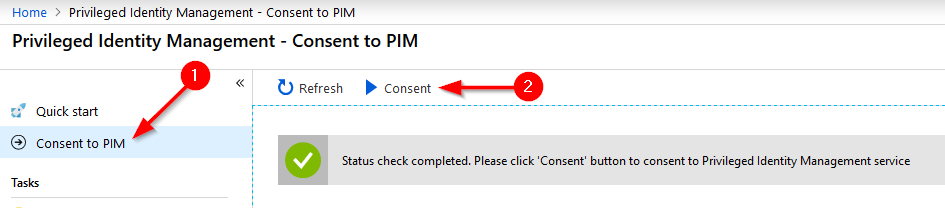
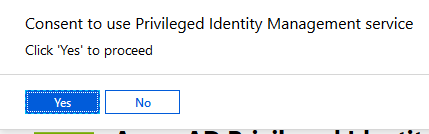
Now we can open the PIM blade. The first thing we need to do from here is consent to PIM. Press “Consent to PIM” and then press the “Consent” button. You will be prompted whether or not you’d like to proceed as an additional level of verification.
Once you have consented, it is wise and recommended to add additional members to the “Security administrator” and “Privileged role administrator” roles in Azure AD. You don’t want to lock yourself out of the console if you delete the last user.
NOTE: Managing PIM requires MFA (as do a handful of the PIM roles), so you will want to make sure you are selecting an account that is or can be setup for MFA.
Since you should be experts at adding users to roles in Azure AD already, I’m not going to walk you through this process but I’ll give you a hint where it’s located:
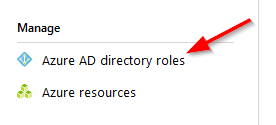
After you get your roles setup for redundancy, we need to activate PIM for Azure AD directory roles. Back in the PIM blade, under “Manage” select the “Azure AD directory roles” button.
Click the “Sign up” button at the top after the status check is completed.

Azure will do a few checks in your environment - looking for privileged roles and their current assignments.

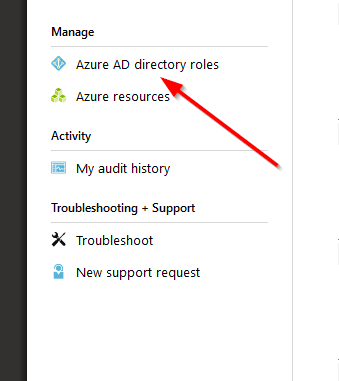
After your roles are discovered, either refresh the page or open up “Azure AD directory roles” again.
Configuring Roles in PIM
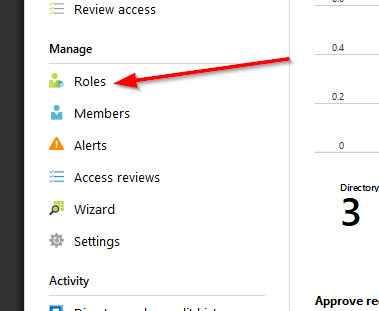
Now we have some new options under manage. First thing we need to do is configure some settings around roles and alerts. Press the “Settings” link.
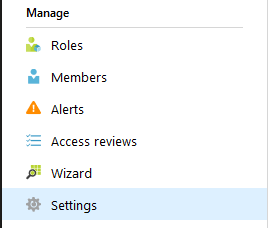
Then press the “Roles” link.

Since this is a demo, why don’t we look at the most important role in our environment - Global Administrator. Find it in the list and select it. You’ll be presented with a list of options configurable for this role.
- Maximum activation duration (hours): determines the maximum amount of time a user can have their elevated access before they have to send another request.
- Require incident/request ticket number during activation: if you’re using a ticketing system and want to keep track of these requests using those numbers, you can enable that in this field.
- Require MFA for activation: if you want users to validate who they are when requesting access, this is where you do it. It’s also forced on a number of different rules (Global Administrator being one of them as you can see).
- Select Approvers: select the users who can approve requests for this level of access.
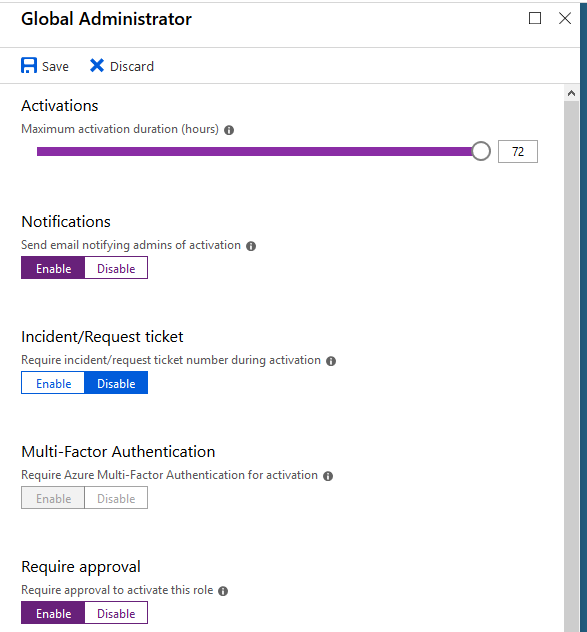
In our case, we’re going to give Cmdr. Mike Metcalf and Lt. Cmdr. Rick Heatherly access to approve requests to be Global Administrators. Notice that Rick doesn’t have to be a Global Administrator to approve GA requests. Pretty neat.
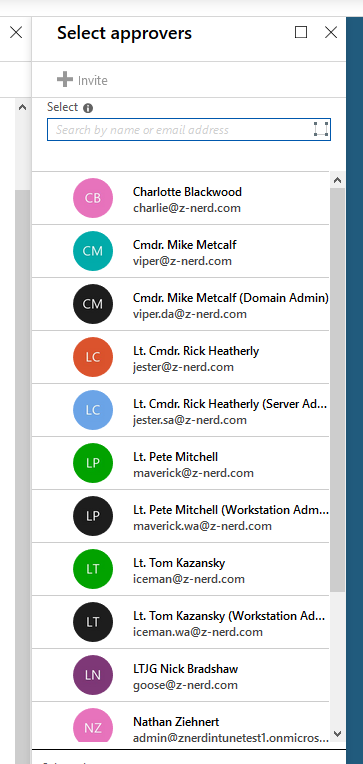
Another thing to note - is that if Rick was an approver for this category and was also eligible for the role - he cannot approve his own requests. Also pretty neat.

Making Users Eligible
Now let’s make someone eligible for the Global Administrator role! Back at the “Azure AD directory roles” page, press the “Roles” button and then at the top of that menu press “Add Member”.
Choose “Select a role” and then select the “Global Administrator” role.
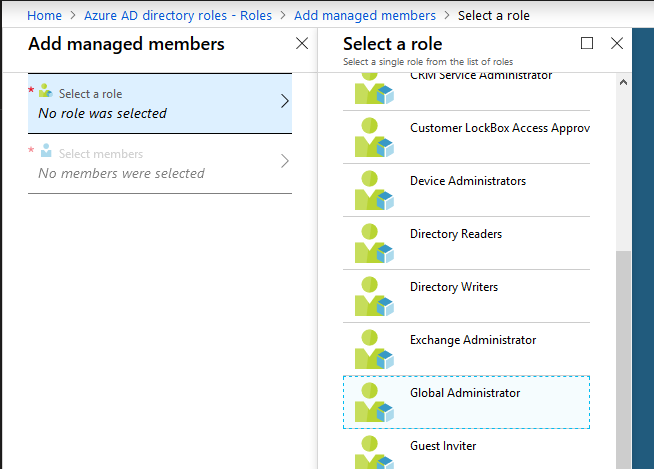
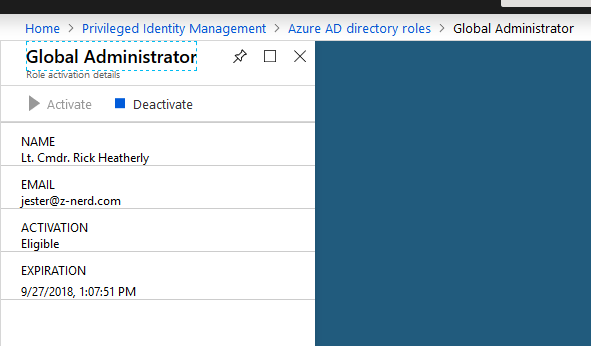
Next we’re going to assign a user as “Eligible” to become Global Administrators. For this example we’ll add Lt. Cmdr. Rick Heatherly. Choose the “Select members” option, locate him, and select him.

Now press the “Members” link and you should see Rick added as Eligible for Global Administrator.

Demoing the Approval Workflow Process
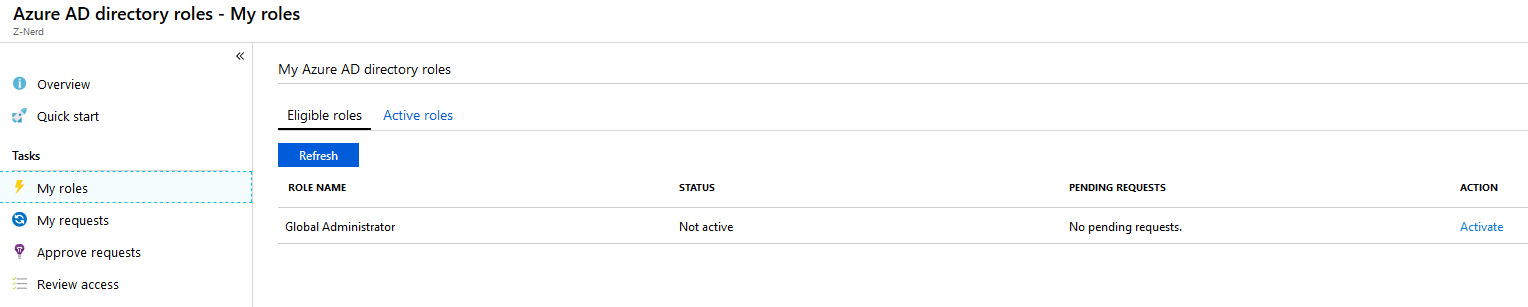
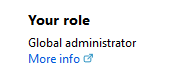
Open up a new private window and logon to the Azure portal with the credentials for the account we gave “Eligible” access to. If your AAD users are configured like mine, you should see that user’s role is just “User”

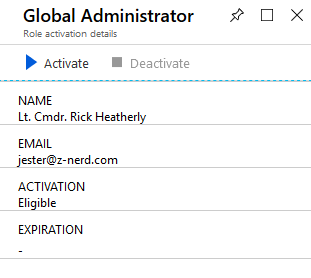
Now we should open up the “Azure AD Privileged Identity Management” blade and click on the “My roles” link. You should see the “Global Administrator” role option available. Press “Activate” to activate the role.
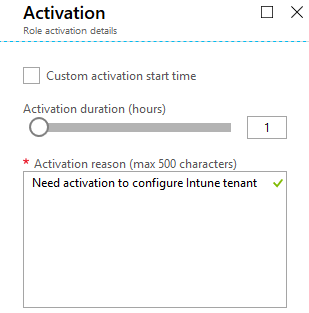
You’ll be taken to another page for activation - you may also be required to authenticate via MFA. Press the “Activate” button and you will be asked for some additional information.
For this demo I’m going to ask for an hour, and give a reason for my request.
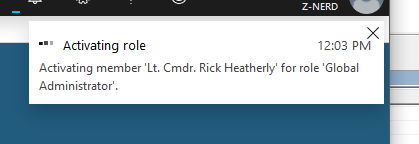
Once I “activate” my role I’ll see a new alert in the portal.
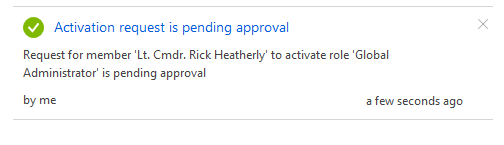
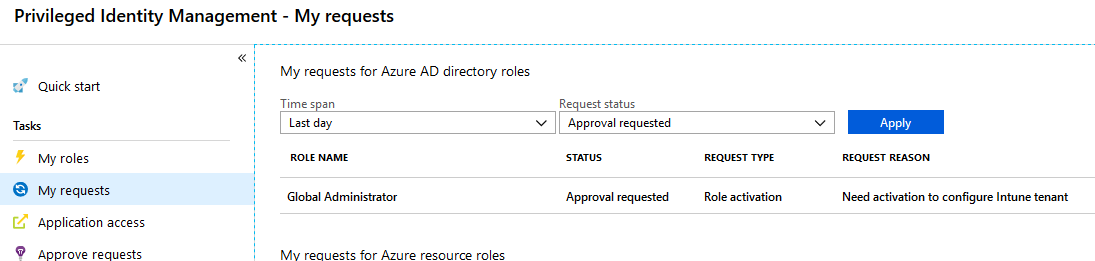
Eventually it will tell me that my request is pending approval.
If we go over to the “My requests” task you can see the status of your current request.
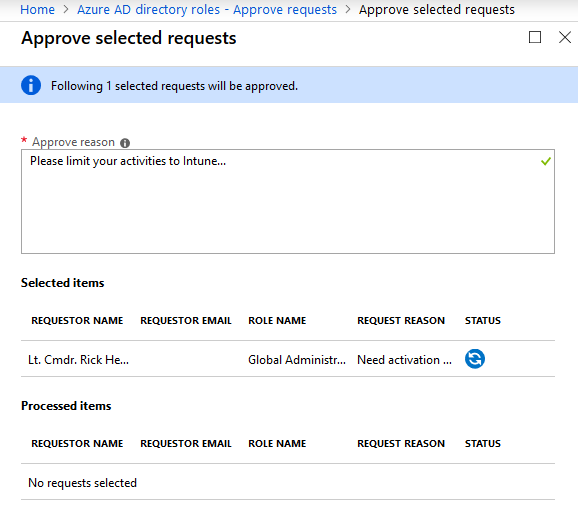
Going back to our original window (or opening Azure AD directory roles from a user who is an approver for Global Administrators) select the “Approve requests” page. Find the request from Rick and then approve it.
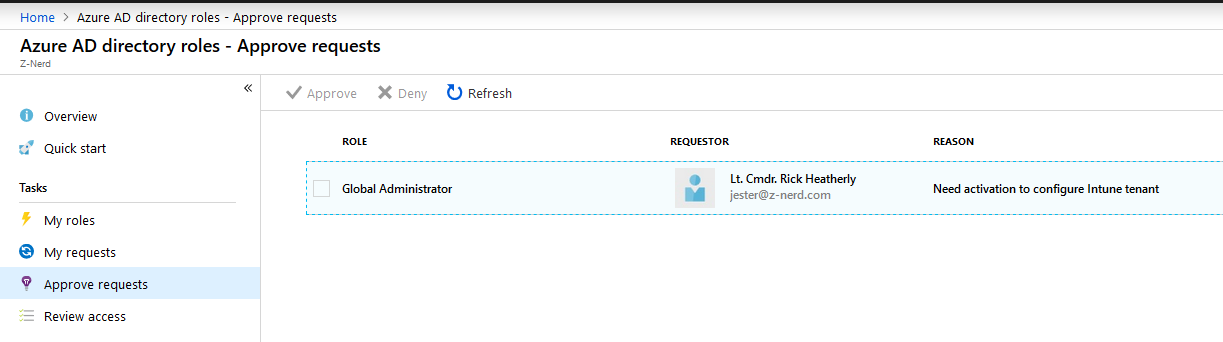
You will need to provide an “approve reason” and then you can approve the request.
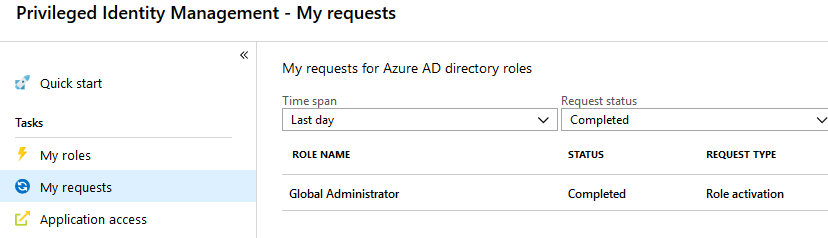
Now we can go back to Rick’s session and see that his approval has been completed if you open up the “My requests” blade.
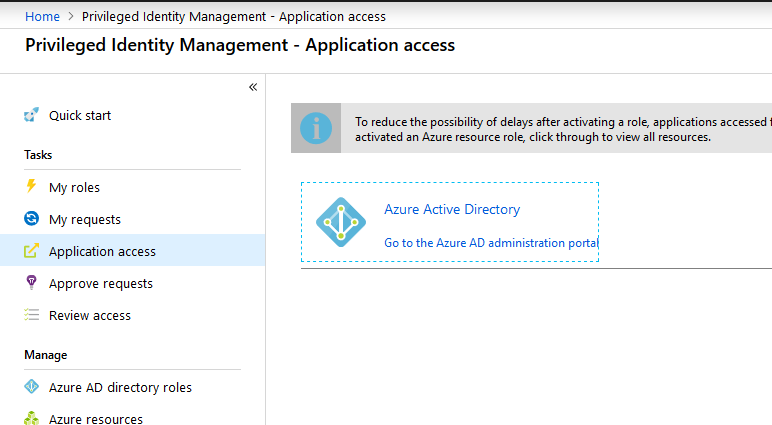
Next to force Azure AD to refresh his rights, open up “Application access” and then select “Go to the Azure AD administration portal”. This will force the application to refresh.
Now if we go back to the Azure AD dashboard, guess what?! Rick is now a Global Administrator… for an hour.
Now Rick can perform a bunch of our necessary tasks. If Rick finishes up early, he can go back to his “Azure AD directory roles” in the PIM blade, and deactivate his access.

Pressing on the “Deactivate” button takes him to a familiar blade from earlier. Now Rick can deactivate his access.
Final Thoughts
We covered a lot in this post, and there is still more to look into. In a future post we’ll take a look at the auditing available to you, as well as configuring the alerting. In the meantime - poke around your Azure AD environment some more. As Ms. Frizzle always said…
“Take chances, make mistakes, get messy, then get wasted”
Didn’t know Ms. Frizzle was a raging alcoholic did you? Well now you do.

Happy Admining!
Share this post
Twitter
Facebook
Reddit
LinkedIn
Email