


Continuing the series on EM+S it’s time to take a look at Multi-Factor Authentication or MFA for short, because now that we have some online services (AAD portal) it would be wise to protect them. Phishing attacks have become more popular than ever because frankly it’s really easy to trick end users (yes, you are an end user too) into clicking on things and entering their passwords without a second thought.

Microsoft offers two separate MFA solutions for EM+S E3/E5 accounts - a cloud solution and an on-premise solution. We’ll be working with the cloud solution today because frankly it’s easier to setup. There are some differences in what they can secure, and we’ll cover those first.
MFA Cloud vs MFA Server (On-Premise)
There is more on the Microsoft docs site about the differences here but I’ll cover the basics in this blog post.
First, depending on where your users reside can make a big difference in which product you choose. If your users reside in Azure Active Directory only, or you are using Azure Active Directory Connect with password hash syncing, you want to choose Cloud MFA. If your users are only in an on-premise AD then you need MFA Server. Otherwise, it’s up to you which product you choose.
Second, if you are trying to secure SaaS apps from the Azure Gallery or if you are trying to secure web applications published through Azure AD App Proxy you want to choose Cloud MFA. If you are trying to secure IIS applications not published through Azure AD App Proxy you will need MFA Server. Anything else and the choice is yours.
Finally, if you want to allow users to “remember” devices for MFA or provide app passwords for Office 365 clients that don’t support MFA (Office 2010 and older) you’ll want to choose MFA Cloud. If you would like to use hardware tokens, PINs, provide a One-Time Bypass, or setup caching rules for consecutive authentications you’ll need MFA Server.
Configuring Cloud MFA
The first thing we want to do is configure our options for Cloud MFA. This includes things like what types of verifications you will allow (App, Phone Call, Text Message), enabling App Passwords, and allowing users to remember MFA for trusted devices.
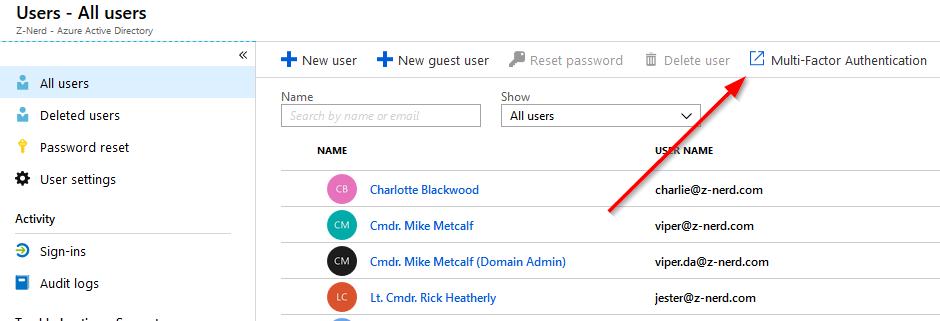
Logon to the Azure AD portal and open your Users blade. Up at the top of the Users blade you will see a link for “Multi-Factor Authentication” - press it and it will open a new window or tab to the classic MFA portal.
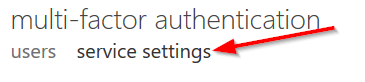
Once in the classic MFA portal we’re going to click on the “service settings” link.
On the “service settings” page make the configuration changes you would like to make but make sure to skip the “Trusted IP” section as we’ll be configuring this using Conditional Access at a later date. Once you make the appropriate changes press the save button. Now that we have the service configured it would be a good idea to pre-register our account for MFA. It’s recommended that if you deploy this to a production environment you give your users ample opportunity to do this as well before enabling.
Visit https://aka.ms/mfasetup to begin the setup process. Based on the settings you picked previously you will have the choice between a few different options. Configure the options you would like to use - I personally like the Authenticator application on my mobile device, but you obviously can choose whatever you like.
Once you have your account configured, let’s move on to creating an MFA policy.
Enabling MFA via Conditional Access
The old way to enable MFA was to open up the classic portal we used for configuring options, and enable users in bulk or individually. The issue with this particular method was that you were limited to enabling ALL cloud apps and every time you provisioned a new user you had to go back into the portal and enable MFA for that user. With conditional access policies (which we’ll cover more in depth at a later date) you have more freedom over what apps to protect, which users to protect, risk analysis, device being used and so much more. Also, since the policies can be applied to Azure AD groups, you don’t have to manually enable MFA for each user.
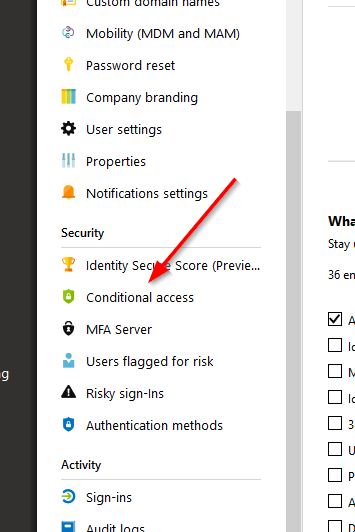
Back in your Azure AD portal locate the “Conditional access” button.
Click on the link and you’ll be taken to the conditional access page. On the conditional access page press the “New Policy” button. Give your policy a name - typically these are going to be descriptive names, but since we’re demoing feel free to choose whatever you want. You could even use a swear *gasp* if you wanted - because really we’re all 13 year olds at heart.

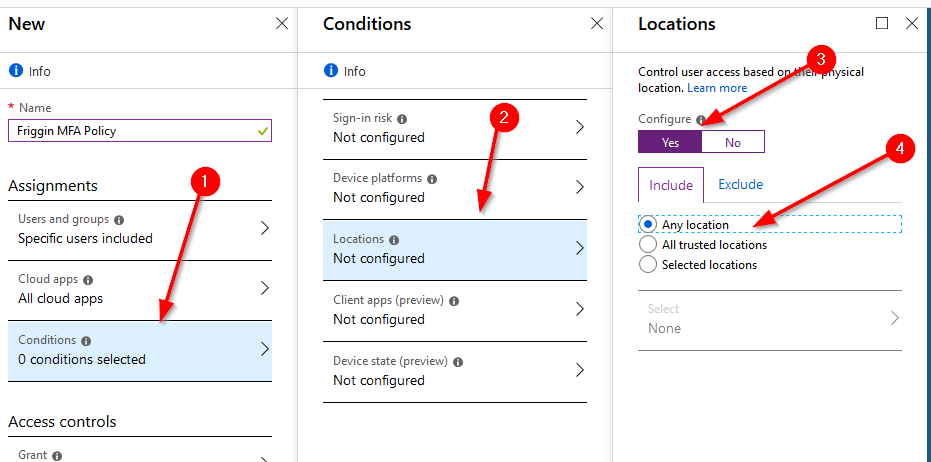
Now we’re going to work down through the list of options. First up is “Users and groups.” This should be self-explanatory - you have the option to include users and/or groups in this policy, as well as explicitly exclude users and/or groups. Excludes override includes, so if a user belongs to both categories the policy will not apply to them.

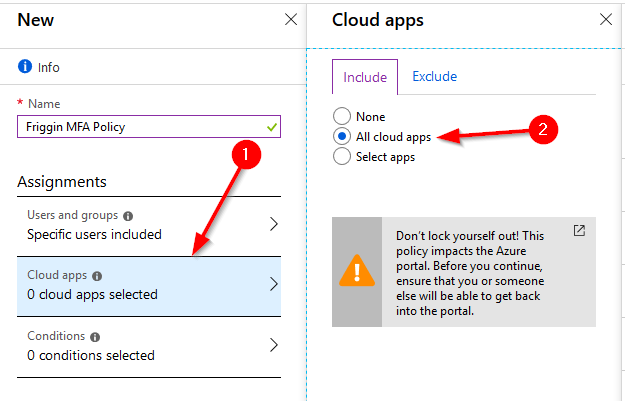
In my example above I’ve added just my Global Administrator account to the policy - you choose whatever account(s) or group(s) you wish. Next select the “Cloud apps” link. We’ll select which apps we’d like to protect - for the purpose of this demo I’m selecting “All cloud apps” because why not? You’re going to receive a warning that this also impacts the Azure Portal so make sure that you have an account that could recover any misconfigured settings. Heed that warning. I may or may not have made a mistake like that before :)
Onto the conditions section. This defines when the policy should be applied. You have the option to use “Sign-In Risk”, Device Platforms (iOS, Windows, MacOS, etc.), Locations (IPs), Client Apps (Browser and Modern Auth apps) and Device State (Intune). For this demo we’re just going to create a policy for “Any Location” since it will force MFA for everything.
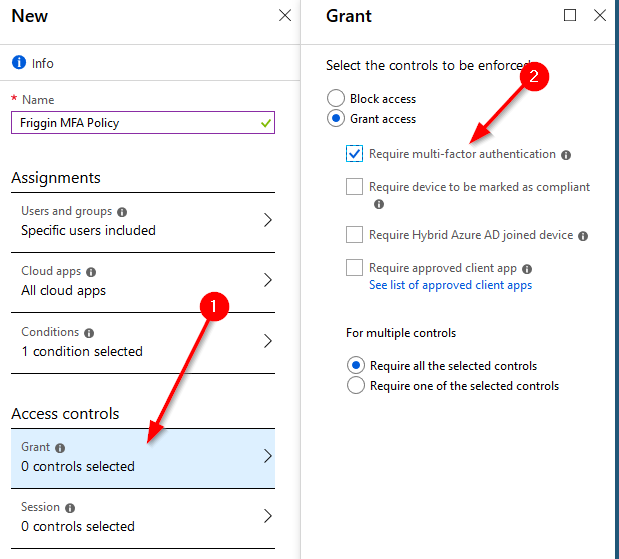
Finally we get to the goods. To cause this conditional access policy to prompt a user for MFA we go to the “Grant” section. We’ll “Grant” access IF the user provides a successful MFA authentication.
We’re going to skip the “Session” section because it’s use is currently rather limited. However if you are interested in reading more about Conditional Access App Control which allows you some more security using the Cloud App Security portal you can read more about it here.
Now we will enable the policy. Press the “On” button and then press the “Create” button and we’ve just created our “Friggin MFA Policy.”

Now we just need to test it! Log out of the Azure portal (or whichever cloud app you protected) and try to logon again with an account you protected.
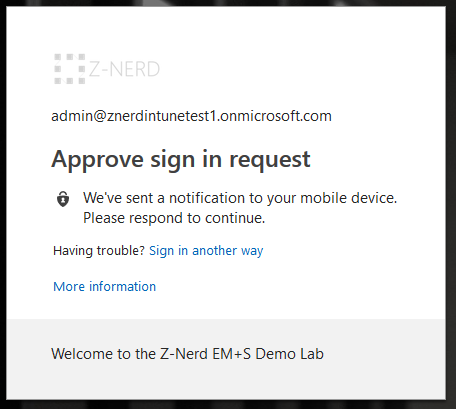
BOOM… you just got MFA’d.
Closing Thoughts
You just got a crash course in conditional access policies. Go you! So technically you learned two things today (or maybe you already knew them). I would suggest that you play around with conditional access further - it’s really incredible. You could try skipping MFA when an account is on your internal network or maybe even give risk based sign-in a shot. I’d recommend creating a test account to test it all (so that you don’t accidentally lock yourself out), but since this is a test environment anyways… you should test! Don’t be afraid to screw something up. If you find yourself in a rut that you don’t know how to dig yourself out of, leave me a message in the comments and I’ll do my best to assist you. At worst you just have to create a new trial account and give it another go.
Happy admining!
Share this post
Twitter
Facebook
Reddit
LinkedIn
Email