


In case you missed it - in the last round we built up our first VM and configured a basic router - I’m not going to promise that this blog post will be any shorter, but here’s to hoping that it will be!
This post will focus mainly on installation and configuration of the “Desktop Experience” for Server 2016 - hear me out when I say that I’m a BIG proponent of PowerShell and honestly I believe that CLI and the “Core” or even “Nano” installations of Windows Server will be the future. With that in mind - I will be including the commands that you would use to perform the steps we are performing today in a “Core” installation as I think it’s important for you to know them (by the way - core installs considerably faster… so it’s got that going for it too). ConfigMgr, for the sake of pretty pictures, I’ll be demonstrating everything from the “Desktop Experience” installation.

All the pretty pictures! So if you’re ready to press on - let’s do this thing and install Server 2016!
If you’re using wget to download the iso… here’s a direct link that I think may work - if not, you can get your very own link it in the same way that was described in the last blog post:
http://care.dlservice.microsoft.com/dl/download/1/6/F/16FA20E6-4662-482A-920B-1A45CF5AAE3C/14393.0.160715-1616.RS1_RELEASE_SERVER_EVAL_X64FRE_EN-US.ISO
Once you have your installation media, let’s create a VM!
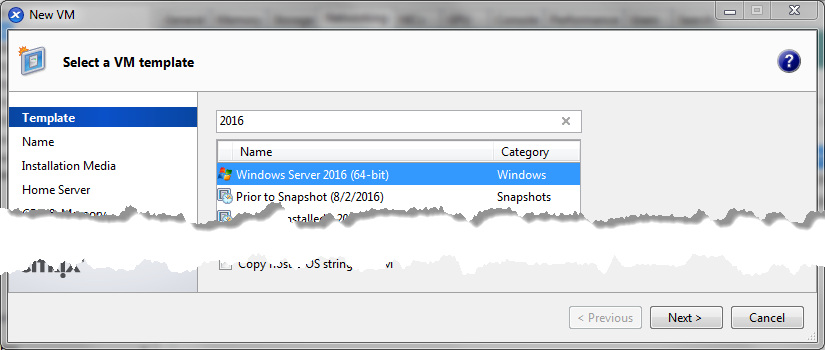
The process is almost identical to how we created the VYOS VM, but this time we’re going to select a VM template based off of “Server 2016”
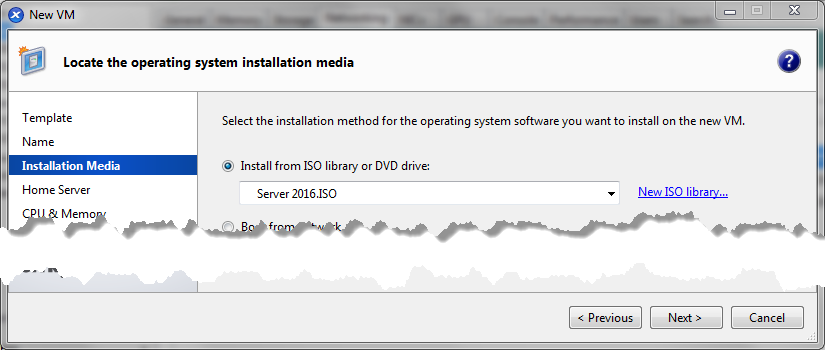
Don’t forget to select the ISO that we just downloaded:
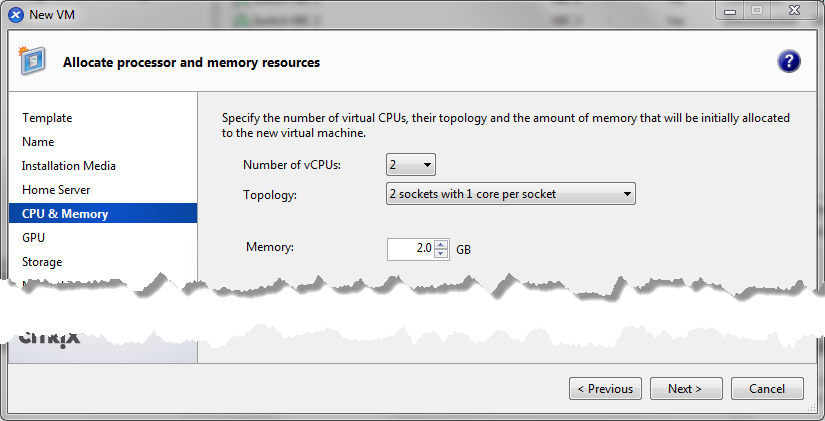
I would also recommend setting this to 2GB of RAM and 2 processors - although 1GB of RAM should be fine. You can always adjust this later.
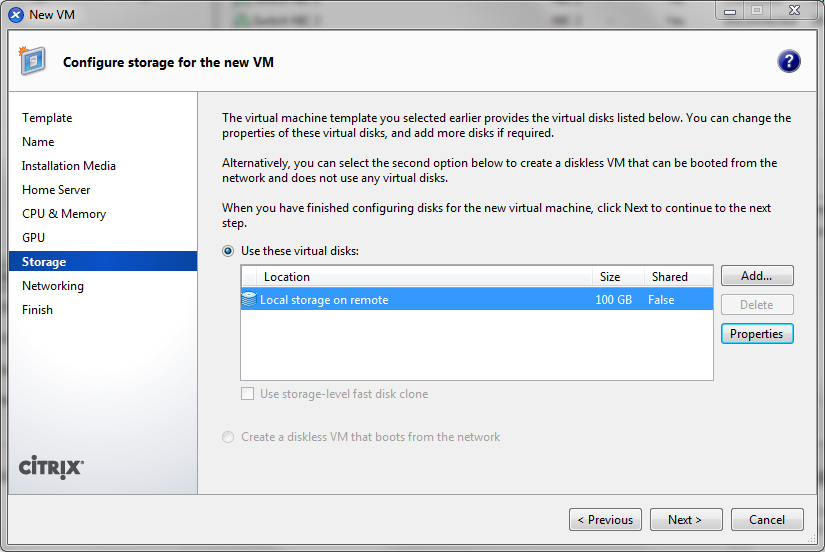
Also, I would change the disk to 100GB (up from 32GB). I find that 32GB just isn’t enough and since we’re thin provisioning these disks anyways, you’re really only technically using the space that you’re actually using.
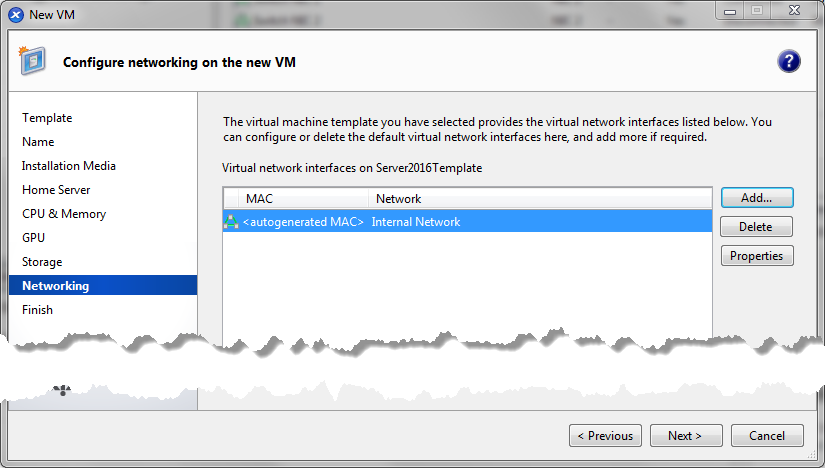
Finally on the network - we only want this thing to have a connection to our internal network (remember the VYOS router will serve as our portal to the Internet).
And that’s it! You should be able to boot to the Server 2016 install media now.
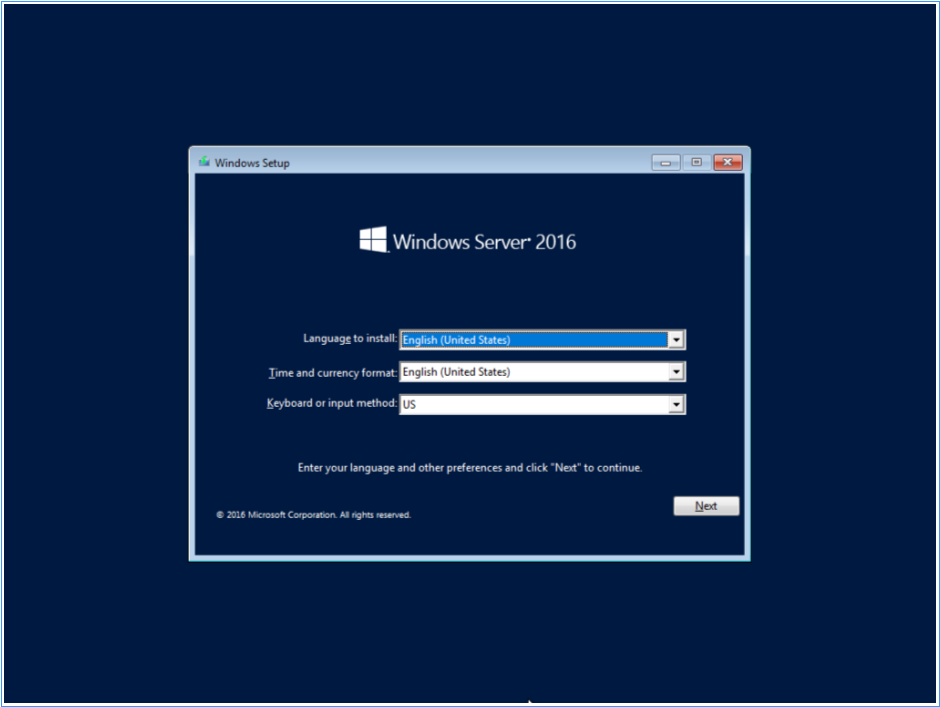
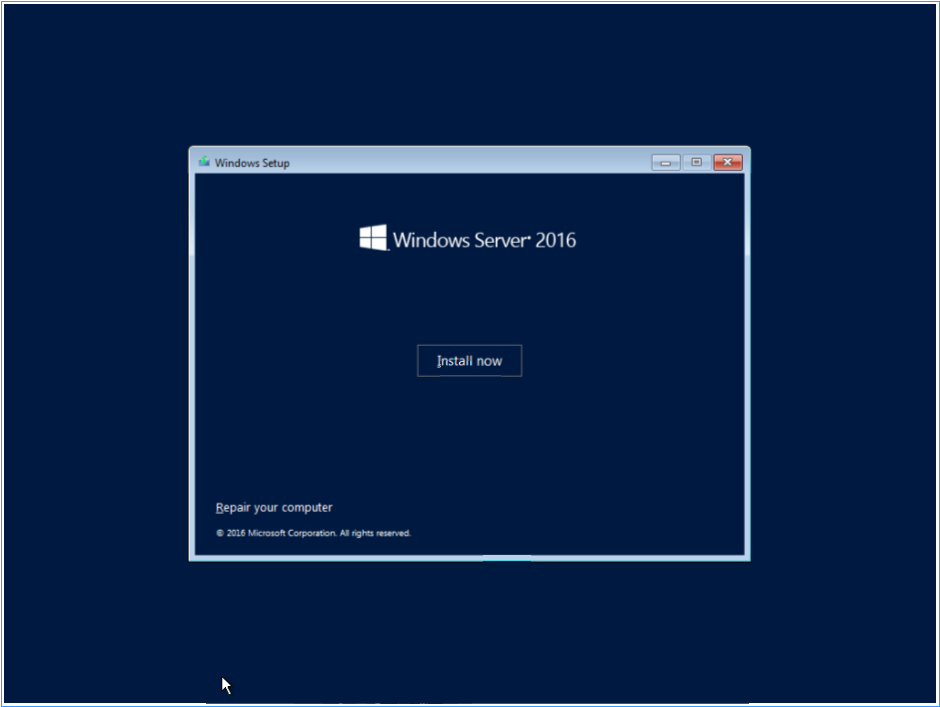
Select a language, press “Next”, and then press “Install now”
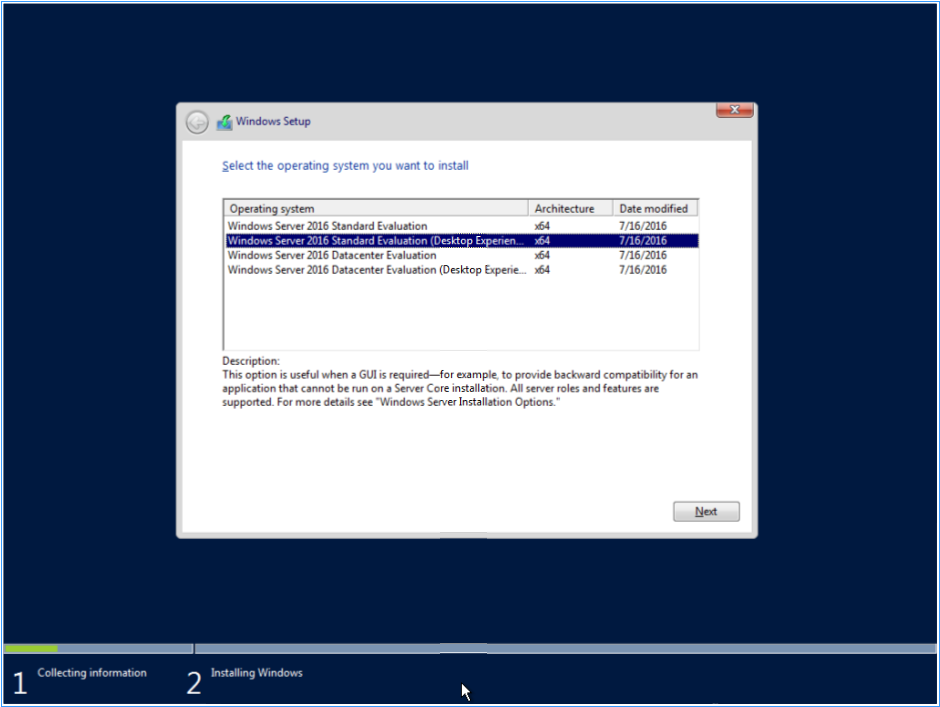
Since we’re using an evaluation version you won’t be prompted for a CD key - if you use your own media that isn’t evaluation, then you’ll need to provide a valid CD key. Select “Windows Server 2016 Standard Evaluation (Desktop Experience)” or for those of you following along with the “Core” installation, just choose “Windows Server 2016 Standard Evaluation”. A quick note on the difference between Standard vs Datacenter - there is no difference, except for licensing. Datacenter basically just allows you to install as many VMs as you can consume under one “Host Hypervisor” and Standard only allows you to create two. Since we’re not creating a Hyper-V server here, standard makes the most sense, but since it’s evaluation anyways pick what you want.
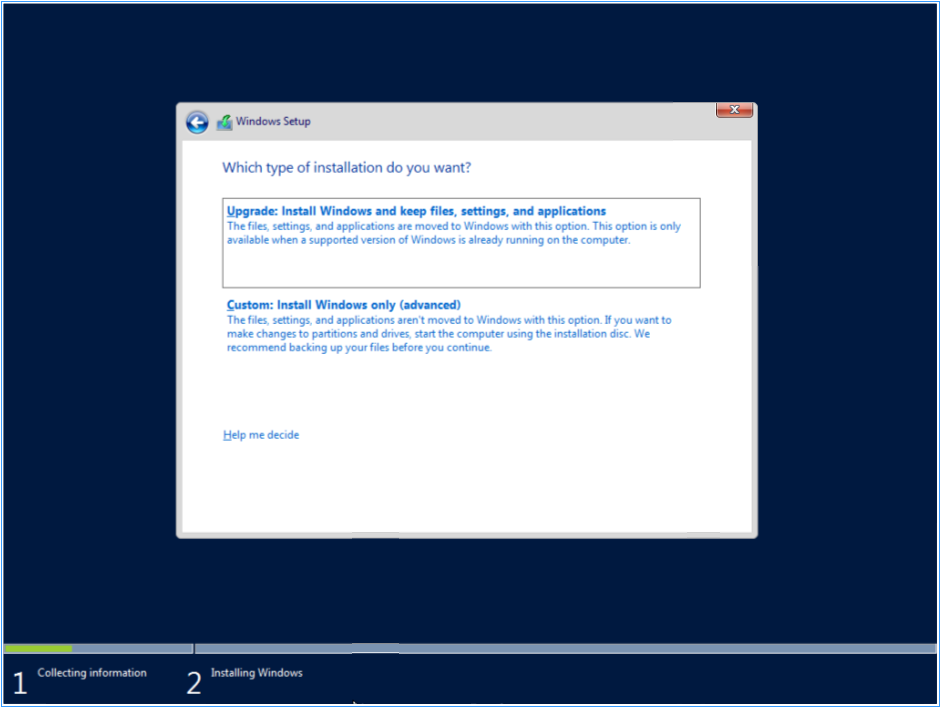
Make sure to drink your ovaltine… and accept your license terms! Then you’ll select “Custom: Install Windows only (advanced)” since we’re not upgrading our OS.
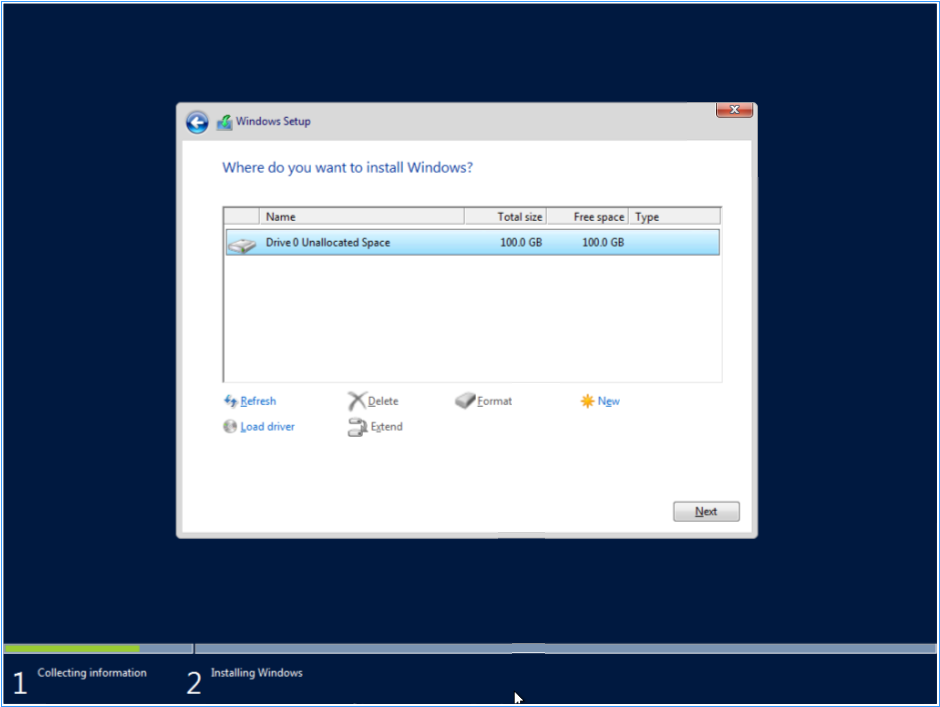
After that, select the disk that we’re installing it on and then select “Next”
Finally the installation will take place… you’ll know it’s done when you are finally presented with the “Customize settings” screen!
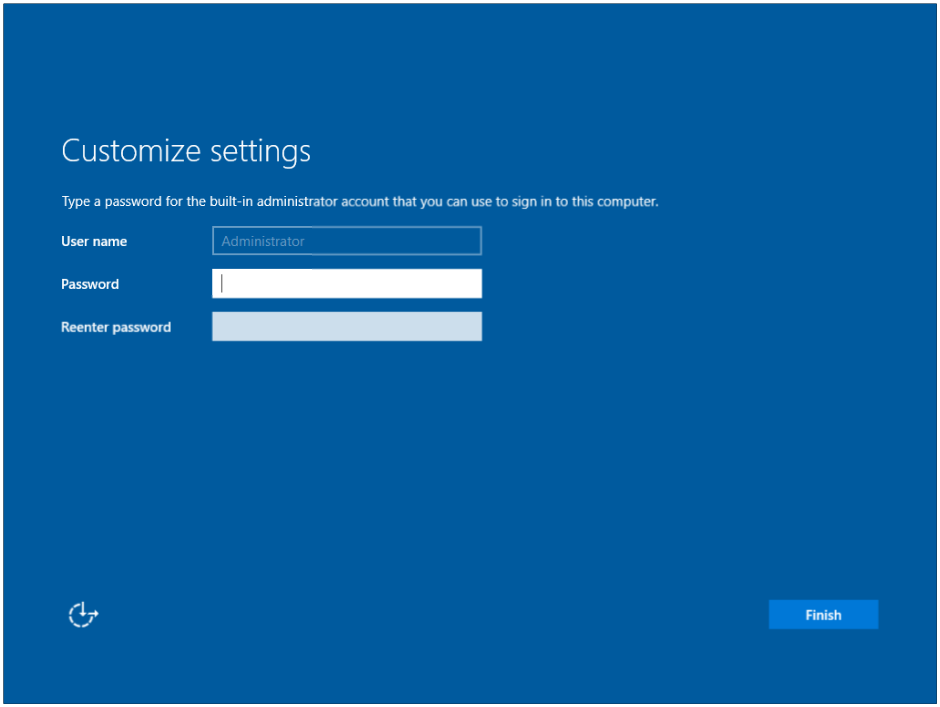
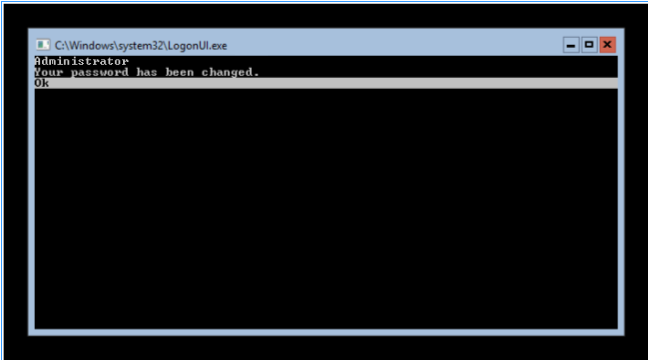
Select a password and then press “Finish” -
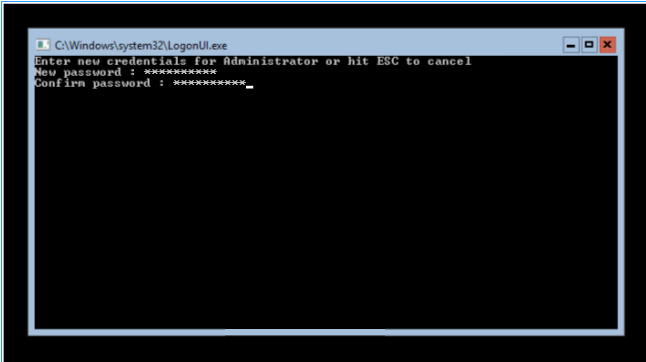
Select Ok and then choose a password.
Press enter, and then “enter” again!
Now you’re ready to update this sucker!
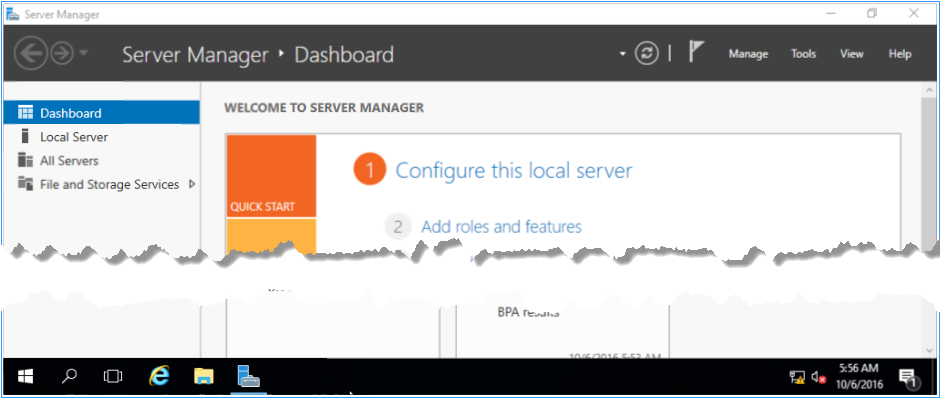
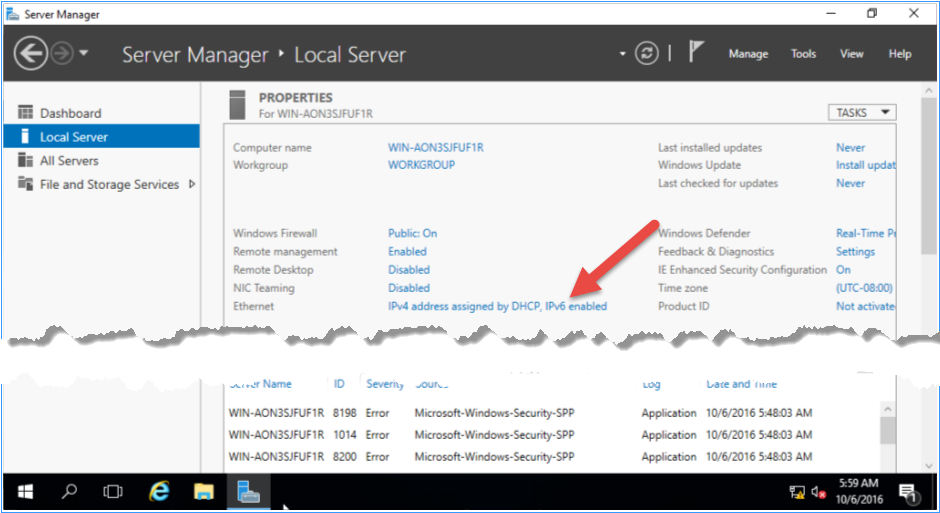
Now since we didn’t set any DNS/DHCP configuration on our VYOS instance we’re going to have to set some manual address info. Press “Configure this local server” and then select the link next to “Ethernet”
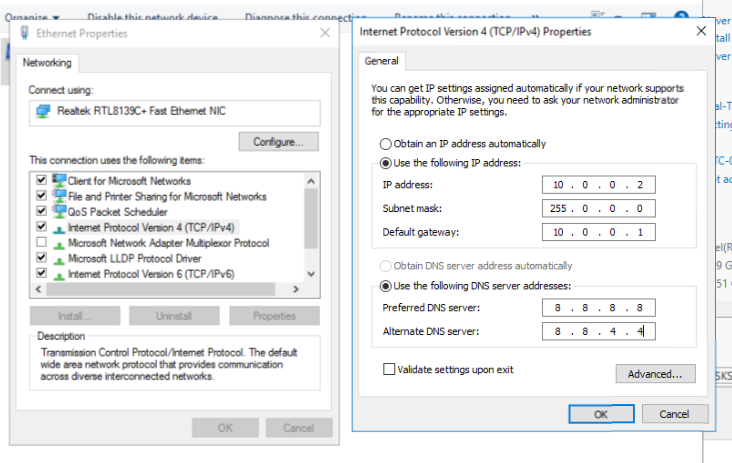
You’ll see the familiar control panel with your list of network adapters! Right click on the adapter and then select properties. Locate the IPv4 entry, select it, and then select properties. For the IP address you’ll want to use 10.0.0.2, with a subnet of 255.0.0.0, and a default gateway of 10.0.0.1. For the DNS you can use whatever DNS servers you’d like, but I prefer Google’s - 8.8.8.8 and 8.8.4.4.
Click OK a couple of times and your machine should be connecting to the network. If not - I dare you to just poke around until you figure it out without Googling. If you still have problems, send me a comment and I’ll do my best to help you troubleshoot your setup.
powershell Get-NetIPAddress | fl InterfaceIndex,InterfaceAlias (make note of the InterfaceIndex for your Ethernet adapter) New-NetIPAddress -InterfaceIndex [from before] -IPAddress 10.0.0.2 -PrefixLength 8 -DefaultGateway 10.0.0.1 Set-DnsClientServerAddress -InterfaceIndex [from before] -ServerAddresses (“8.8.8.8”,“8.8.4.4”)
<h3><strong>Updating Your OS</strong></h3>
A good template is always up to date - otherwise it doesn't necessarily save you a bunch of time. The goal here is to get as close to the steps where you'll be configuring the server (Domain Controller, DNS, DHCP Server, etc) without actually doing any configuration. Maybe you have some tools you want to install (a really common one is <a href="https://technet.microsoft.com/en-us/sysinternals/bginfo.aspx">BgInfo from SysInternals</a>), or maybe you just want to create some sort of image marker on your template (versioning if you will so you know what was applied)... most importantly we just need to apply the updates.
Open up "Server Manager" again and select the link next to "Windows Update"

Select "Check for updates"

And wait for your updates to download:

What is interesting to note - is that Microsoft's new update strategy is to bundle ALL the updates (general updates, security fixes, etc) into one "servicing" or "convenience" update - and to make them cumulative. This is great because in theory it means you only ever have one* update to install (*well, not including definition updates) - but it also means that you might be downloading some hefty updates if you don't keep this thing up to date. Just keep that in mind.
Once the updates are done downloading and installing (I know, you didn't get the option to choose to install them...) press the "Restart now" button and wait for reboot. Now you're done installing updates!
> <h4>Server Core Commands</h4>
> ```
#Open the Server Configuration Menu
sconfig
#Open windows update settings and set to automatic
5
A
#Force an immediate download and install of all applicable updates
6
A
A
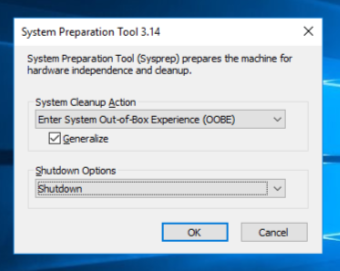
The machine will then sysprep and you have your template ready for the next post in this series!
sysprep /generalize /shutdown /oobe
<h3>Conclusion</h3>
Well, you're well on your way to understanding servers! In the next post in this series we'll look at creating our first AD forest/domain! Until then, thanks for reading and happy admining!
Share this post
Twitter
Facebook
Reddit
LinkedIn
Email